Saturday, January 25, 2025
How to Make a Personalized Cutting Board to Sell: Easy-to-Follow Plans for Crafting and Customization
How to Make a Personalized Cutting Board to Sell: Easy-to-Follow Plans for Crafting and Customization
The handcrafted market is booming, and personalized gifts are always in high demand. Combine these trends by creating and selling custom cutting boards! This lucrative venture allows for creative expression and the satisfaction of producing a beautiful, functional item. This guide provides a step-by-step approach, transforming plain wood into unique, personalized masterpieces ready for your customers’ kitchens.

Choosing Your Materials: The Foundation of Your Craft
Selecting the right materials is crucial for producing high-quality cutting boards. Begin by considering the type of wood. Hardwoods like maple, cherry, or walnut offer superior durability and resistance to knife marks. Softwoods, while more affordable, are prone to scratching and require more care. Explore different wood species to discover variations in grain and color that will appeal to your target market. Beyond the wood itself, you’ll need a good wood glue suitable for food contact (check the label!), sandpaper in various grits (starting with coarser grits and finishing with finer ones), and a food-safe finish. Consider offering a choice of finishes to your customers â€" mineral oil, beeswax, or a specialized food-safe cutting board oil each have their own properties and aesthetics.

Sourcing Your Wood: Options for Every Budget
Where you source your wood significantly impacts cost and quality. Local lumber yards often provide a wide selection of hardwoods at competitive prices, while online retailers offer convenience and a broader range of species. Consider reclaimed wood for an eco-friendly and unique option. Remember to check the wood for imperfections like knots or cracks before starting your project.
Crafting Your Cutting Board: A Step-by-Step Guide
Once you've gathered your materials, it's time to build your cutting board. This process involves precise cutting, careful gluing, and meticulous sanding to achieve a smooth, professional finish. Begin by cutting your wood pieces to the desired dimensions. Ensure the pieces are perfectly square and even for a flawless final product. Then, apply a generous amount of wood glue to one surface of each piece, and firmly clamp them together, allowing sufficient time for the glue to set completely according to the manufacturer's instructions. This is where patience is key; inadequate drying time can lead to board failure.
Sanding to Perfection: Achieving a Smooth Surface
After the glue has dried, the real work begins: sanding. Start with a coarser grit sandpaper (around 80 grit) to remove any excess glue and level the surfaces. Progressively move to finer grits (120, 220, and finally 320 grit) for a flawlessly smooth finish. Remember to sand in the direction of the wood grain to avoid unsightly scratches. Pay special attention to the edges and corners, ensuring they are rounded and free from sharp edges for safety and a polished look.
Adding the Personal Touch: Customization Techniques
Now comes the fun part â€" personalizing your cutting boards! Explore various customization techniques to create unique pieces.
- Engraving: Use a rotary tool or laser engraver to add names, dates, logos, or intricate designs.
- Burning: A wood burning tool allows for artistic designs and personalized messages.
- Inlay: Incorporate contrasting wood species or other materials like mother-of-pearl for eye-catching accents.
- Painting: Use food-safe paints to add vibrant colors or create unique patterns. Always apply a food-safe sealant over painted areas.
Finishing and Packaging: The Final Touches
Once your cutting board is personalized, apply a food-safe finish. This protects the wood from moisture, stains, and bacteria, extending its lifespan and maintaining its beauty. Follow the manufacturer’s instructions for your chosen finish, applying multiple coats for optimal protection. Allow ample drying time between coats. Finally, package your cutting board professionally to protect it during shipping and enhance its presentation. Consider using attractive packaging materials and adding a personalized thank-you note to create a memorable customer experience.
Marketing and Selling Your Creations: Reaching Your Audience
With your beautiful, personalized cutting boards ready, it's time to find your customers. Explore online marketplaces like Etsy or create your own website. Utilize social media platforms such as Instagram and Facebook to showcase your craftsmanship and engage with potential buyers. Attending local craft fairs and farmers’ markets can also provide valuable exposure. High-quality photography and detailed product descriptions are essential for attracting customers and converting browsers into buyers. Don't underestimate the power of word-of-mouth referrals â€" happy customers are your best advertisement!
How to Craft Wooden Toy Boxes for Kids
Crafting Durable and Delightful Wooden Toy Boxes for Children
The creation of a wooden toy box is a rewarding endeavor, combining the practical function of toy storage with the aesthetic appeal of handcrafted artistry. This comprehensive guide will provide a detailed walkthrough of the process, from initial design considerations to the final finishing touches, enabling even novice woodworkers to construct a safe and durable toy box for a child.

Phase 1: Design and Planning

A. Determining Dimensions and Style
The first crucial step involves determining the desired dimensions of the toy box. Consider the available space where the toy box will be placed, the age of the child (influencing accessibility and safety), and the anticipated volume of toys to be stored. Standard dimensions typically range from 30 inches to 48 inches in length, 18 to 24 inches in width, and 16 to 20 inches in height. However, these dimensions are adjustable to accommodate individual needs and preferences. The style can range from a simple, rectangular box to more elaborate designs incorporating curves, decorative elements, or a hinged lid with integrated supports. Sketching multiple designs can aid in the decision-making process.
B. Material Selection and Acquisition
The selection of appropriate wood is paramount. Durability and safety are critical factors. Hardwoods such as oak, maple, or cherry offer superior strength and longevity but may be more expensive and challenging to work with for beginners. Softwoods like pine or fir are more readily available and easier to manipulate, making them suitable for novice woodworkers. However, softwoods are susceptible to dents and scratches, requiring careful handling and potentially more robust finishing. It's crucial to source lumber that is free from knots, cracks, or other imperfections that could compromise the structural integrity of the toy box. Consider the thickness of the wood; 3/4 inch to 1 inch thick lumber is generally recommended for optimal strength and stability.
C. Essential Tools and Equipment
Before commencing construction, ensure you have all necessary tools and equipment. This will include but is not limited to:
- Measuring tape and square
- Circular saw or table saw
- Jigsaw (for intricate cuts)
- Drill with various drill bits
- Screwdriver (or impact driver)
- Sandpaper (various grits)
- Wood glue
- Clamps
- Safety glasses and hearing protection
- Wood finish (paint, varnish, or stain)
- Brushes and rags
Having all tools readily available ensures a smooth and efficient workflow. Ensure all power tools are in good working order and used according to manufacturer’s instructions.
Phase 2: Construction
A. Cutting and Assembling the Box Components
Precise measurements and accurate cutting are essential for achieving a well-fitting toy box. Using the chosen dimensions, cut the lumber for the box sides, bottom, and top. For added strength and stability, consider using rabbet joints or dado joints for the corners, instead of relying solely on screws. Apply wood glue to the joints, and clamp them firmly in place until the glue is dry. This will create a strong and visually appealing box structure. Ensure the bottom is flush with the sides for a smooth, clean finish.
B. Constructing the Lid
The lid construction method depends on the chosen design. For a simple hinged lid, attach hinges to the top edges of the box and the underside of the lid. Heavy-duty hinges are recommended to ensure durability. Ensure the hinges are properly aligned to allow the lid to open and close smoothly without binding. For enhanced safety, consider incorporating soft-close hinges to prevent slamming. Alternatively, for a more decorative and child-safe option, create a removable lid using sturdy latches and carefully plan the placement for easy access and security.
C. Adding Decorative Elements (Optional)
Once the basic structure is complete, decorative elements can be added to personalize the toy box. This could include carved designs, painted scenes, or inlaid pieces of contrasting wood. These additions enhance the aesthetic appeal and provide opportunities for creativity. Ensure any decorative elements are securely attached to prevent accidental detachment and potential hazards for young children. Always keep in mind the child's safety when selecting and applying decorations.
Phase 3: Finishing and Safety
A. Sanding and Smoothing
Thorough sanding is crucial to eliminate any sharp edges or splinters. Start with coarser grit sandpaper and gradually progress to finer grits for a smooth surface. Pay close attention to corners and edges, ensuring a completely smooth and safe finish. This process is important for the both the aesthetic appeal and the safety of the child who will use the toy box.
B. Applying the Finish
Apply a suitable wood finish to protect the wood from wear and tear, enhancing its durability and appearance. Options include paint, varnish, or stain, each offering unique properties. Paint provides vibrant color and excellent protection, varnish offers a clear, protective coating that enhances the natural wood grain, while stain penetrates the wood, enhancing its natural color while providing some protection. Multiple coats may be necessary to achieve optimal coverage and protection. Ensure the finish is completely dry before allowing children to handle the toy box.
C. Safety Considerations
Before presenting the finished toy box to a child, conduct a comprehensive safety check. Ensure all sharp edges and corners are adequately smoothed, all hardware is securely fastened, and the finish is non-toxic and child-safe. If using paint or stain, opt for products specifically designed for children's toys. Regularly inspect the toy box for any signs of damage or wear and repair or replace any damaged components promptly. Adult supervision is always recommended when young children are using the toy box.
By carefully following these steps, you can create a beautiful, durable, and safe wooden toy box that will be cherished for years to come. Remember that patience and attention to detail are key to producing a high-quality, functional, and aesthetically pleasing toy box for a child. The process is a testament to craftsmanship and a lasting gift for a child.
How to Make a Cutting Board with Built-In Knife Holder: A DIY Solution for Kitchen Organization
How to Make a Cutting Board with Built-In Knife Holder: A DIY Solution for Kitchen Organization
Tired of cluttered countertops and searching endlessly for your favorite chef's knife? This DIY project transforms a simple cutting board into a stylish and functional kitchen organizer. By incorporating a built-in knife holder, you'll reclaim valuable counter space and add a touch of personalized charm to your kitchen. This guide provides a step-by-step approach, ensuring even novice DIYers can achieve impressive results. Prepare to enhance your kitchen efficiency and aesthetic with this easy-to-follow tutorial!

Choosing Your Materials: The Foundation of Your Project
Begin by selecting the right materials. The success of your project hinges on choosing durable and aesthetically pleasing components. For the cutting board itself, consider using a thick piece of hardwood like maple or bamboo. These woods offer excellent durability and resistance to knife cuts. Measure your desired cutting board dimensions carefully; consider both your available counter space and your typical cutting needs. For the knife holder, choose a contrasting wood or even a sleek, modern material like stainless steel. Remember to purchase appropriate wood glue, wood screws, and wood finish to protect your creation. Don't forget sandpaper in various grits for smoothing surfaces!

Essential Materials List:
- Thick hardwood board (maple, bamboo, etc.)
- Wood for knife holder (contrasting wood or stainless steel)
- Wood glue
- Wood screws
- Wood finish (oil, varnish, etc.)
- Sandpaper (various grits)
- Measuring tape
- Saw (circular saw or hand saw)
- Drill with drill bits
- Clamps
- Safety glasses and gloves
Constructing the Knife Holder: Precision and Craftsmanship
Now, let's craft the knife holder. Measure and cut the wood to create slots precisely sized for your knives. Accuracy is crucial here to ensure a snug fit and prevent your knives from wobbling. Consider the thickness of your knife blades when designing the slot dimensions. If using a contrasting wood, ensure the chosen wood is compatible with your cutting board wood in terms of hardness and moisture content. For a stainless steel option, you'll need to drill precisely located holes to accommodate the screws that will attach it to the cutting board. Remember to pre-drill pilot holes to prevent wood splitting. Test the fit frequently to ensure everything aligns perfectly.
Assembling Your Cutting Board: A Perfect Union
With the knife holder prepared, carefully apply wood glue to the back of the holder and position it on the cutting board, aligning it precisely. Use clamps to secure the pieces firmly while the glue sets. This ensures a strong bond that will withstand daily use. Once the glue is dry, reinforce the connection by using wood screws. Pre-drill pilot holes to prevent splitting and drive the screws carefully to avoid damaging the wood. Sand down any excess glue or uneven surfaces, achieving a smooth, professional finish.
Finishing Touches: Protecting Your Creation
Finally, apply your chosen wood finish. This step protects the cutting board and knife holder from moisture and wear, extending its lifespan. Follow the manufacturer's instructions carefully, applying several thin coats for optimal protection. Allow ample drying time between coats. Once completely dry, you'll have a beautiful, functional cutting board with a built-in knife holder â€" a true testament to your DIY skills! Enjoy your upgraded kitchen organization and the satisfaction of a job well done!
Safety First!
Remember to always prioritize safety. Wear safety glasses and gloves when using power tools and handling sharp objects. Work in a well-ventilated area when applying wood finishes, and allow adequate drying time before using your new cutting board.
Farmhouse-Style Dining Tables for a Warm and Inviting Aesthetic
Farmhouse-Style Dining Tables: Creating a Warm and Inviting Heart of the Home
The dining table stands as the heart of any home, a place for family gatherings, lively conversations, and shared meals. A farmhouse-style dining table, with its inherent rustic charm and welcoming aesthetic, elevates this central space to a new level of warmth and comfort. Its sturdy construction and often oversized proportions immediately convey a sense of generous hospitality, inviting everyone to gather around and linger long after the last bite.

Choosing the Perfect Farmhouse Table: Wood, Size, and Style
Selecting the ideal farmhouse dining table involves careful consideration of several key factors. Wood type plays a significant role in both the aesthetic and durability of the piece. Reclaimed wood offers a unique history and character, showcasing its past life through knots, variations in color, and subtle imperfections. Solid oak exudes timeless strength and elegance, while pine provides a softer, more approachable look. The size of your table should comfortably accommodate your family and guests, allowing ample space for everyone to sit comfortably and enjoy their meal without feeling cramped. Measure your dining area carefully before making a purchase. Finally, the style should complement your overall home décor. Consider whether you prefer a classic, rectangular table, a more casual round or oval option, or a unique trestle-based design.

Wood Types and Their Characteristics
- Reclaimed Wood: Offers a unique, rustic look with variations in color and texture, showcasing its history.
- Oak: Known for its strength, durability, and elegant grain pattern, offering a timeless appeal.
- Pine: Provides a softer, lighter aesthetic, often more affordable than oak or reclaimed wood.
Enhancing the Farmhouse Aesthetic: Seating and Accessories
Once you've chosen your perfect farmhouse table, consider how the surrounding elements can further enhance the overall aesthetic. Seating plays a crucial role. Simple, sturdy chairs crafted from wood or upholstered in durable fabrics create a cohesive look. Mix-and-match chairs, perhaps incorporating some vintage finds, can add personality and visual interest. Accessories further elevate the space. A charming centerpiece, whether a rustic arrangement of wildflowers or a collection of antique milk bottles, instantly adds warmth. Woven placemats, linen napkins, and simple ceramic tableware contribute to the overall feeling of rustic elegance. Don't be afraid to incorporate personal touches, family heirlooms, or collected items that tell a story â€" these are what truly bring the heart of your home to life.
Beyond the Basics: Unique Farmhouse Table Variations
The farmhouse aesthetic is remarkably versatile. While the classic rectangular table remains a staple, explore the possibilities of unique variations. Consider a live-edge table, which showcases the natural, unrefined edge of the wood, emphasizing its organic beauty. A farmhouse table with a bench offers a more casual and communal seating arrangement. For smaller spaces, a drop-leaf table provides versatility, allowing you to expand or contract the table's size as needed. These design choices allow you to personalize your dining space and create a truly unique and inviting atmosphere.
Creating a Warm and Welcoming Space: The Final Touch
Ultimately, a farmhouse-style dining table is more than just furniture; it's the anchor of a warm and inviting space. It's a place where memories are made, stories are shared, and family bonds are strengthened. By carefully selecting the right table, thoughtfully choosing your seating and accessories, and infusing your space with personal touches, you'll create a dining area that truly reflects your style and embraces the heart of the farmhouse aesthetic.
Beginner's Guide to DIY Wooden Cutting Board: Crafting and Finishing with Simple Tools
Beginner's Guide to DIY Wooden Cutting Board: Crafting and Finishing with Simple Tools
Hey there, fellow crafters! So you're thinking about making your own wooden cutting board? Fantastic! It's a rewarding project, even for complete beginners. This guide will walk you through the process step-by-step, using only simple tools and readily available materials. Let's get started!

Choosing Your Wood
The first step is selecting your wood. This is arguably the most important decision, as it impacts both the look and the longevity of your cutting board. Here's what to consider:

Hardwoods are Best
Hardwoods like maple, cherry, walnut, or oak are ideal. They're denser and more resistant to wear and tear than softwoods like pine. While softwoods are cheaper, they’ll likely get gouged and scratched much faster.
Consider the Aesthetics
Think about the look you're going for. Maple provides a clean, bright appearance. Cherry offers warm reddish tones that deepen with age. Walnut boasts beautiful dark grain, and oak provides a classic, rustic feel. You can even get creative and use a combination of woods for a more unique design!
Source Your Wood
You can find wood at home improvement stores, lumber yards, or even online. Look for boards that are at least 1 inch thick for durability. If you're buying from a lumber yard, ask about the wood's moisture content. Ideally, it should be around 6-8% for indoor use to prevent warping.
Preparing the Wood
Once you've chosen your wood, it's time to prep it for cutting. This stage is crucial for a safe and successful project.
Cutting the Board to Size
Use a measuring tape and pencil to mark your desired dimensions on the wood. A good starting size for a beginner is about 12" x 15". For cutting, a circular saw is ideal but a handsaw will work too, though it will require more effort and precision. Remember to wear safety glasses!
Sanding is Key
This is where the magic (and elbow grease) happens. Start with a coarser grit sandpaper (around 80-100 grit) to remove any rough spots and saw marks. Gradually move to finer grits (120, 180, 220) for a smoother surface. Sand in the direction of the wood grain to avoid scratches. Take your time â€" you want a beautifully smooth surface.
Gluing and Clamping (for multi-wood boards)
If you're using multiple pieces of wood, this is the step you'll need to follow. Single-piece boards can skip this step.
Applying Wood Glue
Apply a thin, even layer of wood glue to the surfaces that will be joined. Don't overdo it; excess glue can squeeze out and create a mess. A good quality wood glue is essential for a strong bond.
Clamping the Pieces Together
Carefully clamp the pieces together, ensuring that they're aligned and flush. Use enough clamps to apply even pressure across the entire surface. Allow the glue to dry completely according to the manufacturer's instructions (usually overnight).
Finishing Your Cutting Board
This is where your cutting board starts to look like the gorgeous, functional piece you envisioned.
Mineral Oil Finish
This is the most popular and food-safe finish for cutting boards. It penetrates the wood, nourishing it and creating a water-resistant barrier. Apply several coats, allowing each coat to soak in completely before applying the next. Use a clean cloth to wipe off any excess oil.
Other Food-Safe Finishes
While mineral oil is common, you could also use beeswax or a food-safe cutting board oil. Always check the label to ensure the product is suitable for food contact.
Let it Cure
After applying the finish, let your cutting board cure for at least 24 hours. This allows the oil to fully penetrate the wood and create a durable, protective layer. You can even let it cure for several days to ensure optimal protection.
Handling and Care
With your beautiful, handmade cutting board complete, let's discuss proper care and maintenance.
Hand-Washing is Best
Always hand-wash your cutting board with warm soapy water. Avoid putting it in the dishwasher, as the high heat and harsh detergents can damage the wood and the finish.
Oil Regularly
To keep your cutting board in top condition, oil it periodically (every few months, or whenever it feels dry). This will help maintain its moisture content and protect it from cracking.
Avoid Extreme Temperatures
Don't leave your cutting board in direct sunlight or near a heat source, as this can cause it to warp or crack.
Commonly Asked Questions
Here are some questions beginners often ask:
- Q: What type of wood glue should I use? A: A good quality, water-resistant wood glue is recommended. Titebond is a popular brand.
- Q: How many coats of mineral oil should I apply? A: Apply at least three coats, allowing each coat to absorb fully before adding the next. More is better for protection!
- Q: Can I use a different type of finish? A: While mineral oil is recommended, you can use other food-safe oils or waxes. Always double-check the label to ensure it's safe for food contact.
- Q: How long does it take to make a cutting board? A: The total time depends on the complexity of the design and your experience level. A simple board can be completed in a day or two, while more intricate projects may take longer.
- Q: What if my cutting board cracks? A: Cracking is usually due to improper drying of the wood or inconsistent finishing. Minor cracks might be repairable with additional oil and care; significant cracks may unfortunately require replacement.
- Q: Can I use a planer? A: If you're comfortable using a planer, it can significantly speed up the flattening and smoothing process. However, it is advised that beginners stick to hand-sanding until they are more comfortable with woodworking tools.
And there you have it! Your journey into the wonderful world of DIY cutting boards has just begun. Remember, practice makes perfect, so don't be discouraged if your first attempt isn't flawless. Have fun, be patient, and enjoy the process!
Friday, January 24, 2025
Decorative Wooden Picture Frames with Hand-Carved Details
Elevate Your Memories: The Allure of Hand-Carved Wooden Picture Frames
Imagine a cherished photograph, not simply displayed, but showcased in a frame that is a work of art in itself. A frame that speaks of craftsmanship, history, and the enduring beauty of natural wood. This is the promise of hand-carved wooden picture frames â€" pieces that transform a simple image into a captivating heirloom, a tangible testament to cherished moments.

The Artistry of Hand-Carving
Forget mass-produced uniformity. Each hand-carved wooden picture frame tells a unique story. Skilled artisans pour their heart and soul into every piece, meticulously shaping the wood with chisels and other specialized tools. The process is labor-intensive, demanding patience, precision, and an unwavering commitment to detail. From the initial sketch to the final sanding, each step reflects the artist's dedication to creating a truly exceptional piece.

Choosing the Perfect Wood
The selection of wood is paramount. Artisans carefully choose from a variety of hardwoods, each possessing unique characteristics. Rich mahogany offers a deep, luxurious tone, while the lighter hues of oak exude warmth and elegance. The subtle grain patterns of cherry wood add a touch of rustic charm, while the intricate figuring of walnut creates a dramatic focal point. The choice of wood dictates not only the final aesthetic but also the durability and longevity of the frame.
The Intricacy of Design
The designs themselves are as varied as the artisans who create them. Some frames boast classic, elegant lines, featuring subtle moldings and smooth curves. Others showcase bolder, more intricate carvings, incorporating floral motifs, geometric patterns, or even scenes from nature. The possibilities are truly endless, allowing for a frame to perfectly complement any photograph and style of décor.
Beyond Decoration: A Legacy of Craftsmanship
Owning a hand-carved wooden picture frame is more than simply possessing a decorative item; it's about investing in a piece of history. These frames are tangible links to a tradition of skilled craftsmanship, passed down through generations. Each frame becomes a small piece of living art, holding not just a picture, but a story of dedication, artistry, and enduring quality.
Caring for Your Heirloom
To ensure your hand-carved wooden picture frame remains a cherished possession for years to come, proper care is essential. Avoid placing the frame in direct sunlight to prevent fading and warping. Dust regularly with a soft cloth, and periodically apply a furniture polish designed for wood to maintain its luster and protect it from damage. With proper care, these frames can become treasured family heirlooms, passed down from generation to generation, preserving memories and showcasing the artistry of skilled hands.
Finding the Perfect Hand-Carved Frame
The hunt for the perfect hand-carved wooden picture frame is an adventure in itself. Explore local art galleries, artisan markets, and online shops specializing in handcrafted goods. Look for frames that speak to you, those with designs and wood types that reflect your personal style and the sentiment of the photograph they will hold. Remember, this is more than just a frame; it's a statement piece, a testament to your appreciation for both art and cherished memories.
Take your time, consider your options, and choose a frame that will not only beautifully display your photos but will also be a cherished heirloom for years to come.
Building a Wooden Shoe Rack for Entryway Organization
Kick Off Chaos: Building Your Dream Wooden Shoe Rack
Okay, let's be honest. Entryways. They're the black holes of our homes, right? Shoes strewn everywhere, coats piled haphazardly, keys mysteriously vanishing… it's a daily struggle. But what if I told you we could conquer this chaos with a simple, stylish, and completely DIY solution? We're talking about building a stunning wooden shoe rack â€" and I'm here to guide you through every step.

Planning Your Perfect Shoe Rack: Size, Style, and Species
Before you even think about touching a saw, we need a plan. This isn't brain surgery, but a little forethought will save you headaches (and maybe some splinters!).

Sizing Up Your Space:
First things first: measure your entryway. How much space do you realistically have? Are we talking a petite nook or a grand foyer? A massive rack in a small space will look overwhelming, and a tiny rack in a large space will look… well, tiny and inadequate. Consider both the height and width, and think about how many shoes you need to store. Do you need space for boots, sandals, sneakers, and everything in between? This will dictate the number of shelves and the overall dimensions of your rack.
Choosing Your Style:
Next up: aesthetics! Do you want a rustic farmhouse look? A sleek modern design? Something a little more traditional? Your style will heavily influence the type of wood you choose and the overall design. Browse Pinterest or Instagram for inspiration â€" you'll find tons of amazing shoe rack ideas to spark your creativity!
Consider these style options:
- Rustic: Think reclaimed wood, visible knots, and a natural, unfinished or lightly stained finish.
- Modern: Clean lines, simple geometry, and a smooth, potentially painted finish.
- Traditional: More ornate details, possibly with molding or decorative elements. Think classic shaker style.
Selecting Your Wood:
The type of wood you choose affects both the look and the durability of your shoe rack. Here are a few popular options:
- Pine: Affordable, readily available, and easy to work with, but can be softer and more prone to dents.
- Oak: Strong, durable, and beautiful, but more expensive than pine.
- Maple: Hard, dense, and light-colored, offering a clean, contemporary look.
- Reclaimed wood: Adds character and sustainability but can be more challenging to work with.
Think about your budget and the overall style you're aiming for when making your selection.
Gathering Your Tools and Materials: A Shopper's Checklist
Now for the fun part (well, maybe not *fun* fun, but definitely satisfying!): gathering your supplies. You'll need a few essential tools and materials. Don't worry, you probably have some of these already!
Tools:
- Measuring tape
- Pencil
- Saw (circular saw or hand saw)
- Drill
- Screwdriver (or drill with screwdriver bits)
- Sandpaper (various grits)
- Safety glasses
- Level
- Wood glue
- Clamps (optional, but helpful)
Materials:
- Wood (based on your chosen dimensions and style)
- Wood screws
- Wood stain or paint (optional)
- Polyurethane or other sealant (optional)
Building Your Wooden Shoe Rack: Step-by-Step
Alright, let's get building! This part will vary slightly depending on your chosen design, but here's a general outline. Remember to always prioritize safety and take your time.
Cutting Your Wood:
Using your measurements and design plans, cut your wood to the appropriate sizes. This is where a saw comes in handy! Make sure your cuts are straight and accurate. Use clamps to hold your wood securely in place while cutting.
Assembling the Frame:
Depending on your design, you'll either construct a frame first (for a more sturdy rack) or attach shelves directly to the side supports. Use wood glue and screws to join the pieces together, ensuring everything is square and level.
Adding the Shelves:
Once the frame is built (if applicable), attach the shelves. You can use shelf supports or simply screw the shelves directly into the frame. Again, make sure everything is level to prevent your shoes from toppling over!
Sanding and Finishing:
Once everything is assembled, sand down any rough edges or imperfections. Start with coarser sandpaper and gradually move to finer grits for a smooth finish. Then, apply your chosen stain, paint, or sealant. Follow the manufacturer's instructions carefully.
Adding Personal Touches: Making it Yours
This is where you get to truly personalize your shoe rack! Add some flair with these ideas:
- Unique hardware: Upgrade your screws with decorative knobs or handles.
- Stencils or decals: Add a fun pattern or design.
- Built-in seating: If space allows, consider adding a small bench or seat to the top.
Frequently Asked Questions
Here are some common questions people have about building wooden shoe racks:
Q: What’s the best type of wood to use?
A: It depends on your budget and desired look. Pine is affordable and easy to work with, while oak and maple offer more durability and a nicer aesthetic.
Q: How much time does it take to build a shoe rack?
A: This varies depending on complexity and your experience level. A simple rack could take a few hours, while a more complex design might take a day or two.
Q: Can I build a shoe rack without power tools?
A: Yes, you can build a shoe rack using hand tools, but it will take longer and require more effort.
Q: What if I mess up?
A: Don't worry, mistakes happen! Woodworking is a learning process. You can always fix minor errors with sandpaper or wood filler.
Q: Where can I find plans for different shoe rack designs?
A: You can find countless free plans online via websites like Pinterest, Instructables, and Ana White.
So there you have it! With a little planning, some elbow grease, and a dash of creativity, you can transform your chaotic entryway into a stylish and organized space. Happy building!
Rustic Console Table Plans for a Farmhouse Look
Craft Your Dream Rustic Console Table: A Farmhouse Style Guide
Transform your entryway or living room with a handcrafted rustic console table. This detailed guide provides step-by-step plans to build your own farmhouse-style masterpiece, brimming with character and charm. Forget generic store-bought furniture; embrace the satisfaction of creating something unique and beautiful with your own two hands. We'll walk you through selecting materials, cutting precise measurements, and assembling your console table, resulting in a piece you'll cherish for years to come.

Choosing Your Rustic Materials: The Heart of Farmhouse Style
The beauty of a rustic console table lies in the imperfections. Embrace the natural character of reclaimed wood, which lends itself perfectly to the farmhouse aesthetic. Consider using weathered barn wood for a truly authentic look, or opt for pine or oak for a more readily available and slightly softer feel. For a truly unique piece, experiment with combining different types of wood; perhaps a darker, richer wood for the legs contrasted with lighter wood for the tabletop. Remember to thoroughly inspect your lumber for any significant damage or warping before starting construction. Sanding will be your friend here, smoothing out imperfections and preparing the wood for stain or paint. Don't shy away from knots and natural variations in the wood grain â€" these add to the rustic charm!

Essential Materials List:
- Reclaimed wood planks (or pine/oak) for the tabletop
- Reclaimed or new wood for the legs and supports (consider using 4x4s for sturdy legs)
- Wood glue
- Wood screws (various sizes)
- Sandpaper (various grits)
- Wood stain or paint (your choice!)
- Polyurethane sealant
- Measuring tape
- Saw (circular saw or miter saw recommended)
- Drill
- Screwdriver bits
- Clamps
Building Your Farmhouse Console Table: A Step-by-Step Guide
Begin by carefully measuring and cutting your wood to the desired dimensions for the tabletop and legs. Ensure your cuts are precise and clean for a professional finish. Once the wood is cut, use wood glue and screws to securely attach the supports (typically stretchers) to the legs, creating a sturdy frame. Pre-drill pilot holes before screwing to prevent splitting the wood. Next, carefully attach the tabletop to the frame. Use clamps to hold everything securely in place while the glue dries. Allow ample drying time for the glue to fully set. This step is crucial for the structural integrity of your console table.
Assembling the Frame and Tabletop: Precision and Patience
Accuracy is key in this phase. Double-check your measurements at each step to ensure everything aligns perfectly. Use clamps to hold the pieces together firmly while you drive in the screws. Don't overtighten the screws; this could strip the wood or damage the threads. A little patience goes a long way in creating a beautifully constructed table. Once the glue has dried and the clamps are removed, inspect the frame for stability. Any wobble needs to be addressed before proceeding.
Finishing Touches: Adding Farmhouse Flair
Once your console table is assembled, sand all surfaces thoroughly to achieve a smooth finish. Apply your chosen wood stain or paint, following the manufacturer's instructions carefully. Allow sufficient drying time between coats. Finish with a protective layer of polyurethane sealant to enhance the durability and protect your beautiful creation. Consider adding decorative hardware, such as antique-style drawer pulls or simple knobs, if your design incorporates drawers. This is where you can personalize your console table and add your unique style. Remember, the goal is to create a piece that reflects your personality and complements your farmhouse aesthetic.
Adding Personality with Distressing and Hardware:
For a truly authentic rustic look, consider distressing the wood slightly after the finishing coats are dry. This can be achieved by gently sanding certain areas to expose some of the wood beneath the paint or stain, giving it a worn, lived-in look. Choose hardware that complements the overall style; black or brushed nickel finishes generally work well with a farmhouse theme.
With a little time and effort, you can create a stunning, handcrafted rustic console table that will be the envy of your friends and family. Enjoy the process and the beautiful result!
Woodworking Plan for Crafting a Traditional Wooden Cajon Drum
Building Your Own Traditional Wooden Cajon: A Step-by-Step Guide
Hey there, fellow music lovers! Ever wanted to build your own instrument? It's way more satisfying than you might think, and today we're tackling a classic: the cajon. This percussive box drum is surprisingly simple to make, even for beginners, and the sound you get is incredibly rewarding. This guide will walk you through the process, step-by-step, so grab your tools and let's get started!

Choosing Your Wood and Gathering Materials
The first step, and arguably the most important, is selecting your wood. For a traditional sound, you'll want something with a nice resonance. Plywood is a popular choice because it's readily available, relatively inexpensive, and offers a good balance of strength and flexibility. I'd recommend a 12mm or 15mm thick birch plywood sheet for the best sound. However, don't be afraid to experiment with other hardwoods like pine or mahogany â€" each wood will give you a slightly different tonal character.

Essential Materials:
- Plywood (12mm-15mm thick, approximately 30cm x 30cm for the front and back, and 30cm x 40cm for the sides. Adjust sizes according to your desired cajon dimensions.)
- Wood glue (a good quality waterproof wood glue is recommended)
- Clamps (lots of them! At least four strong bar clamps are ideal)
- Screws (25mm-30mm wood screws, countersinking screws are better)
- Sandpaper (various grits, from coarse to fine)
- Saw (circular saw, jigsaw, or hand saw â€" whatever you're comfortable using)
- Measuring tape and pencil
- Drill with drill bits (to pre-drill screw holes)
- Optional: Wood stain or paint, varnish or polyurethane (for finishing)
- Optional: Snare wires (for a more defined snare sound)
Constructing the Cajon Body
Once you've got your materials gathered, it's time to build the box! This is the fun part.
Cutting the Wood:
Carefully measure and cut your plywood sheets according to your desired cajon dimensions. Accuracy is key here, so take your time and double-check your measurements. A good tip is to create a template from cardboard before committing to the cuts, especially if you are using a hand saw.
Assembling the Box:
Apply a generous bead of wood glue to the edges of the side pieces. Then, carefully align the pieces and clamp them tightly together. Ensure the corners are perfectly square â€" this will affect the resonance of your cajon. Let the glue dry completely according to the manufacturer's instructions (usually around 24 hours). Once the glue is dry, you can reinforce the joints with screws. Pre-drill the screw holes to prevent the wood from splitting.
Adding the Front Panel (Soundboard):
Now for the front panel. This is the most critical part, as it significantly affects the cajon's sound. You'll attach it from the inside, leaving it slightly inset from the edges. This creates a resonant cavity and reduces the risk of cracking during playing.
This is often secured using more wood glue and clamps or it can be held in place with thin wood shims, providing just enough clearance and preventing movement. Consider using small amounts of adhesive on the shims to ensure the panel stays firmly in position.
Creating the Sound
The sound of your cajon will largely depend on the material you use and the way you build it. Let's explore how to achieve different sounds.
The Soundboard:
The thickness of your soundboard drastically alters the sound your cajon produces. Thicker boards yield a deeper bass; thinner boards will make it sound brighter. Experimentation is key, so consider making a few different soundboards to see which sound you prefer. It is also beneficial to note that softer woods are known for warmer sounds.
Internal Modifications:
You can modify the internal sound of your cajon by adding internal bracing or different materials, such as adding small wood blocks to create a different sound. The placement of these internal additions can change the tone of your cajon. By strategically locating them closer to the edges or the center of your cajon, you can change the sound.
Snare System (Optional):
Adding snare wires is another way to customize the sound. This will create that characteristic "snappy" sound associated with many cajons. You can purchase pre-made snare wire systems, or you can create your own using thin metal wires, screws, and small washers. Experiment with the tension of the wires to find the sound you like best.
Finishing Your Cajon
Once your cajon is assembled, it's time to sand it down and finish it. This will protect the wood and enhance its appearance.
Sanding:
Start with a coarser grit sandpaper and gradually move to finer grits. Sand all surfaces smoothly, paying close attention to the edges and corners.
Finishing:
You can finish your cajon with wood stain, paint, varnish, or polyurethane. Apply several thin coats, allowing each coat to dry completely before applying the next. Let it cure for a few days before playing to allow the finish to harden properly.
Commonly Asked Questions
Here are some frequently asked questions about building a cajon:
- Q: What type of wood glue should I use? A: A high-quality waterproof wood glue is recommended for durability.
- Q: How long does it take to build a cajon? A: Depending on your experience and pace, expect to spend anywhere from a few hours to a couple of days.
- Q: Can I use different types of wood? A: Yes, you can. Experiment with different types of wood to achieve various sounds. Hardwoods generally provide a clearer sound.
- Q: How do I make the sound louder? A: A larger box size generally leads to a louder sound. You can also experiment with the thickness of the soundboard and internal bracing.
- Q: What if my cajon sounds dull? A: Try adjusting the tension of the snare wires (if used), or experiment with different internal bracing techniques. Sometimes, the wood itself can contribute to a dull sound. Different wood types will impact sound.
- Q: Can I make a smaller cajon? A: Absolutely! Just adjust the dimensions to your preferences. Smaller cajons usually have a higher pitched sound.
There you have it! Building your own cajon is a rewarding experience, and hopefully, this guide has given you the confidence to get started. Remember, don't be afraid to experiment and have fun with it. Enjoy the process and the beautiful music you'll create with your handmade cajon!
Simple Wooden Coasters for Beginners to Make at Home
Craft Your Own: Simple Wooden Coasters for Beginners
Tired of those boring, mass-produced coasters? Yearning for a creative outlet that yields tangible results? Then look no further! This guide will walk you through crafting your own beautiful, personalized wooden coasters, perfect for beginners. Forget complex techniques and expensive materials â€" this project is designed for simplicity and satisfaction. You’ll be amazed at how quickly you can transform plain wood slices into charming, functional additions to your home décor.

Gathering Your Supplies: Keeping it Simple
Before you unleash your inner artisan, gather these essential supplies. The beauty of this project lies in its accessibility; you likely already have some of these items around the house. Don't be intimidated by a long list â€" it's deceptively easy!

Essential Materials:
- Wooden slices: Craft stores offer pre-cut slices in various sizes and thicknesses. Choose a thickness that feels substantial but not overly heavy. Aim for around ½ inch to ¾ inch.
- Sandpaper: You'll need a variety of grits, starting with a coarser grit (like 80 or 100) for initial smoothing and finishing with a finer grit (like 220) for a polished look.
- Wood stain or paint: Choose your favorite color or finish. Wood stain allows the natural wood grain to show through, while paint provides a bolder, more opaque coverage.
- Polyurethane sealant (optional but recommended): This protects your coasters from water damage and enhances their longevity. Choose a water-based sealant for easier clean-up.
- Cloth rags or paper towels: These are crucial for applying stain, paint, and sealant.
- Paintbrushes (if using paint): Choose brushes suitable for the type of paint you select.
Creating Your Coasters: A Step-by-Step Guide
With your materials assembled, let's embark on the crafting process. Each step is straightforward, designed to build your confidence and reveal the beauty hidden within those simple wood slices.
Step 1: Sanding for Smoothness
Begin by sanding each wood slice thoroughly. Use the coarser sandpaper first to remove any rough edges or imperfections. Gradually move to finer grits, always sanding in the direction of the wood grain. This step ensures a smooth surface for a flawless finish. Feel the surface with your fingers â€" it should feel incredibly smooth!
Step 2: Applying Stain or Paint
Once sanded, apply your chosen stain or paint. If using stain, apply thinly and evenly, working with the wood grain. Allow it to soak in for the recommended time (check the product instructions). For paint, apply two thin coats, allowing each coat to dry completely before applying the next. This prevents drips and ensures an even coat.
Step 3: Sealing for Protection
After your stain or paint has dried completely, apply a coat of polyurethane sealant. This crucial step protects your coasters from spills and extends their lifespan. Apply thinly and evenly, letting it dry completely before using your beautiful new coasters.
Showcasing Your Creations: Enjoy the Finished Product!
Congratulations! You have successfully crafted your own set of unique and charming wooden coasters. Display them proudly â€" they’re a testament to your creativity and newfound crafting skills. These coasters aren't just functional; they’re also conversation starters, showcasing your personal touch and adding a warm, handcrafted element to your home.
Pro-Tip: Get creative with personalization! Consider adding designs using stencils, stamps, or even burning techniques (if you have access to a wood-burning tool) for a truly unique look.
Thursday, January 16, 2025
DIY Wooden Bread Box Ideas That Will Wow Your Guests
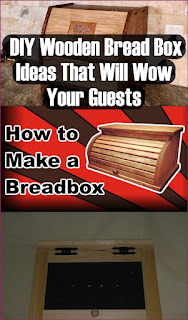
DIY Wooden Bread Box Ideas That Will Wow Your Guests
Hey there, fellow bread lovers! Let's talk about something seriously cool: building your own stunning wooden bread box. Forget those flimsy plastic things â€" we're diving into the world of handcrafted, rustic charm that'll make your kitchen the envy of every bread-obsessed friend you have. And trust me, it's easier than you think! This isn't some high-level carpentry project; even if your experience is limited to assembling flat-pack furniture, you can totally pull this off.Why a DIY Wooden Bread Box?
Okay, so why bother making your own when you can buy one? Well, for starters, a homemade bread box is a unique piece of furniture that reflects your personality and style. It's a conversation starter, a testament to your creativity, and a much more beautiful alternative to mass-produced options. Plus, you get to choose the exact wood, the stain, the size â€" everything! It’s fully customizable to your kitchen’s aesthetic. Think of the satisfaction of proudly displaying a bread box you crafted with your own two hands.
Beyond the bragging rights, a wooden bread box is actually really practical. It keeps your bread fresher for longer by regulating moisture and airflow â€" far better than a plastic container that traps stale air. And, let's be honest, it just *looks* better.
Design Ideas to Make Your Heart Sing (and Your Guests' Jaws Drop)
The beauty of a DIY project is the freedom to personalize it completely. Here are a few ideas to get those creative juices flowing:
The Rustic Farmhouse Charm
Think reclaimed wood, a slightly distressed finish, maybe some simple metal hinges. This style works beautifully in kitchens with a cozy, country vibe. You can even add little details like a chalkboard panel on the front for jotting down the day's baking schedule!
The Sleek Modern Minimalist
Clean lines, smooth surfaces, and a simple, understated design are key here. A light-colored wood like birch or maple would work perfectly, with maybe some subtle metal accents. This style complements contemporary kitchens effortlessly.
The Shabby Chic Delight
Embrace the imperfectly perfect! This style uses lighter woods, often painted in soft pastel colors, with a slightly distressed or chipped finish. Consider adding delicate knobs or handles for an extra touch of whimsy. This design works well in brighter, airy kitchens.
The Industrial Edge
Use darker woods, like walnut or oak, and incorporate industrial elements such as metal pipes or rivets. A simple, boxy design with strong, visible joinery would be perfect here. It would make a striking statement in a modern or industrial-style kitchen.
Getting Started: Tools and Materials You'll Need
Before you get started, make sure you have everything you need. This list is a general guideline, and you might need to adjust it based on your specific design:
- Wood: Choose your wood carefully! Consider the type of finish you want (rustic, smooth, etc.) and the overall style of your kitchen. Pine, oak, and cedar are popular choices.
- Measuring Tape and Pencil: Accurate measurements are crucial!
- Saw (Hand Saw or Circular Saw): Depending on your woodworking skill and the type of wood you've chosen.
- Wood Glue:
- Clamps:
- Sandpaper (various grits):
- Wood Stain or Paint (and brushes): Select a stain or paint that complements your kitchen's style.
- Hinges:
- Screws:
- Safety Glasses and Dust Mask: Always prioritize safety!
Step-by-Step Guide (a simplified version, because we’re keeping it fun!)
This is a very basic overview. For detailed instructions, you'll want to check out online tutorials and woodworking plans. But here’s a general idea:
- Design and Cut: Plan your dimensions and cut the wood pieces according to your design. Make sure everything is square and accurate!
- Assemble the Box: Use wood glue and clamps to join the pieces together. Let the glue dry completely.
- Sanding is Key: Smooth out any rough edges with sandpaper. This step makes a HUGE difference in the final finish.
- Apply Stain or Paint: Follow the manufacturer's instructions for your stain or paint. Consider applying multiple coats for even coverage.
- Attach Hinges and Handle: Attach the hinges to the lid and box, and add a handle for easy access.
- Admire Your Masterpiece: Step back and bask in the glory of your handmade bread box!
Beyond the Basics: Adding Some Extra Wow Factor
Want to take your bread box to the next level? Here are some fun additions:
- Etching or Burning Designs: Add a personalized touch with a simple design etched or burned onto the wood.
- Adding a Cutting Board Lid: Make the lid a functional cutting board for ultimate convenience.
- Incorporating a Magnetic Closure: For a sleek and modern look.
- Using Different Wood Species: Mix and match wood types for a unique visual effect.
- Adding Decorative Hardware: Choose unique knobs, handles, or hinges to match your style.
Commonly Asked Questions
Q: What type of wood is best for a bread box?
A: Many woods work well. Cedar is naturally resistant to moisture and insects, making it a good choice. Oak and pine are also popular, offering different levels of durability and aesthetic appeal.
Q: How do I keep my bread fresh in a wooden bread box?
A: A wooden bread box allows for better air circulation than plastic containers, helping to prevent mold and extend freshness. You might consider adding a piece of cloth or paper towel to absorb excess moisture.
Q: How long does it take to build a wooden bread box?
A: This depends on your experience and the complexity of your design. A simple bread box can be completed in a weekend, while more intricate designs might take longer.
Q: What if I don't have any woodworking experience?
A: Don't worry! There are plenty of beginner-friendly plans and tutorials available online. Start with a simple design and take your time. Woodworking is a skill that develops with practice.
So there you have it! Building your own wooden bread box is a rewarding project that combines creativity, practicality, and a whole lot of charm. Get out there, gather your tools, and start creating! You'll be amazed at what you can accomplish. And most importantly, you'll have the satisfaction of knowing that you created something beautiful and functional for your home. Happy building!
Say Goodbye to Stale Bread with These DIY Wooden Bread Box Ideas

Say Goodbye to Stale Bread with These DIY Wooden Bread Box Ideas
The aroma of freshly baked bread, a culinary delight enjoyed across cultures and generations, is often tragically short-lived. The enemy of this delectable treat? Stale bread. However, with the implementation of a proper bread storage solution, this culinary tragedy can be easily averted. This article explores the enduring elegance and practicality of wooden bread boxes, offering a comprehensive guide to crafting your own, thereby ensuring your bread remains fresh and flavorful for longer.
The Allure of the Wooden Bread Box
Beyond its practical function of preserving bread, the wooden bread box holds a certain charm. It represents a return to simpler times, an appreciation for handcrafted items, and a commitment to sustainable living. Unlike plastic containers that often leach chemicals and contribute to environmental waste, a wooden bread box offers a natural, aesthetically pleasing, and eco-friendly solution. The inherent properties of wood contribute to its effectiveness as a bread storage container. Wood is a breathable material, allowing for proper air circulation while preventing excessive moisture buildup, which is a major contributor to bread staling.
Choosing the Right Wood
The selection of wood is a crucial step in constructing a durable and aesthetically pleasing bread box. Several factors should be considered, including the wood's resistance to moisture, its durability, and its aesthetic appeal. Hardwoods such as oak, maple, cherry, and walnut are excellent choices. These woods are dense, resistant to warping and cracking, and boast a natural beauty that enhances the overall appearance of the bread box. Softwoods, while potentially less durable, can still be used, provided they are treated appropriately with a food-safe sealant. Pine, for example, is a readily available and affordable option, but it requires more attention to waterproofing.
Design Considerations for Your DIY Bread Box
Before embarking on the construction process, careful consideration should be given to the design aspects of your bread box. Several factors will influence the final product's appearance and functionality. Consider the following:
- Size and Shape: The size of your bread box should be proportionate to the amount of bread you typically consume. A smaller box is ideal for smaller households, while a larger box is necessary for families with a higher bread consumption rate. The shape can range from simple rectangular boxes to more elaborate designs with curved edges or decorative elements.
- Lid Style: The choice of lid style greatly impacts the functionality and aesthetic appeal of the bread box. A hinged lid offers easy access and keeps the box closed securely. A sliding lid offers a more modern and sleek aesthetic, but it may not be as airtight as a hinged lid.
- Ventilation: Proper ventilation is crucial for preventing mold growth and ensuring the bread stays fresh. Consider incorporating small holes or slats in the box's design, particularly in the lid or sides. Avoid excessive ventilation, however, as this could lead to the bread drying out too quickly.
- Finishing Touches: Once constructed, the bread box can be further enhanced with various finishing touches. A food-safe oil or wax can enhance the wood's natural beauty and protect it from moisture damage. You can also add decorative elements such as handles, carvings, or painted designs, allowing for personalization and aesthetic expression.
Step-by-Step Guide to Building a Simple Wooden Bread Box
This guide outlines the construction of a basic rectangular bread box. More complex designs will require more advanced woodworking skills and tools.
Materials Required
- Wood planks (sufficient to create the sides, bottom, and lid)
- Wood glue
- Wood screws
- Sandpaper (various grits)
- Food-safe wood finish (oil or wax)
- Hinges
- Measuring tape
- Saw (hand saw or power saw)
- Drill
- Screwdriver
- Clamps
Construction Process
- Cut the Wood: Cut the wood planks to the desired dimensions for the sides, bottom, and lid of the bread box. Ensure accurate measurements to ensure proper assembly.
- Assemble the Box: Apply wood glue to the edges of the wood planks and clamp them together to form the sides and bottom of the box. Secure the joints with wood screws. Allow the glue to dry completely.
- Attach the Lid: Attach the hinges to the lid and the top edge of the box. Ensure that the hinges allow for smooth and secure closure of the lid.
- Sand the Surfaces: Once the glue has dried, sand all surfaces of the bread box with sandpaper, starting with a coarser grit and gradually moving to a finer grit. This will create a smooth surface and prepare the wood for finishing.
- Apply Finish: Apply a food-safe wood finish, such as oil or wax, to protect the wood and enhance its natural beauty. Follow the manufacturer's instructions for application and drying time.
Beyond the Basics: Advanced Bread Box Designs
While the basic rectangular bread box offers functionality and simplicity, more experienced woodworkers can explore more complex designs. These designs can incorporate intricate joinery techniques, decorative elements, and unique features. Consider these possibilities:
- Dovetail Joints: These strong and visually appealing joints add a level of sophistication to the bread box.
- Mortise and Tenon Joints: This traditional joinery method creates a robust and durable connection.
- Carved Designs: Adding carved patterns or designs enhances the aesthetic appeal and personalizes the bread box.
- Inlaid Wood: Inlaying contrasting wood species can create visually striking effects.
- Metal Accents: Incorporating metal handles, hinges, or latches adds a touch of elegance.
Creating a DIY wooden bread box is a rewarding project that combines practicality with artistic expression. By carefully selecting the wood, designing the box, and following the construction steps, you can craft a beautiful and functional bread box that will keep your bread fresh and add a touch of rustic charm to your kitchen.
DIY Wooden Bread Box Ideas for Elegant Countertop Display

DIY Wooden Bread Box Ideas for Elegant Countertop Display
The humble bread box, once a purely functional kitchen staple, has evolved into a statement piece, capable of enhancing the aesthetic appeal of any countertop. A handcrafted wooden bread box, in particular, offers a unique blend of rustic charm and modern elegance, seamlessly integrating into a variety of kitchen styles. This article explores several DIY projects, guiding the discerning home crafter through the process of creating a truly bespoke and beautiful bread box.
Choosing Your Style and Materials
Before embarking on your DIY journey, careful consideration of style and materials is paramount. The aesthetic of your bread box should complement the overall design of your kitchen. A rustic farmhouse kitchen might benefit from a naturally finished pine box, while a contemporary space might call for a sleek, minimalist design crafted from oak or maple.
Wood Selection and Preparation
The choice of wood significantly impacts both the final look and the longevity of your bread box. Hardwoods such as oak, cherry, maple, and walnut offer superior durability and resistance to warping and cracking. They also boast a beautiful grain pattern that adds character. Softwoods like pine and cedar are more affordable but may require more careful handling during construction and may be more susceptible to damage over time. Regardless of your choice, ensure the wood is properly dried and free of knots or imperfections that could compromise the structural integrity of the box.
Prior to construction, the wood should be sanded smooth to prevent splintering and to create a consistent surface for finishing. Start with a coarser grit sandpaper (e.g., 80-grit) to remove any major imperfections and gradually progress to finer grits (e.g., 120-grit, then 220-grit) for a smooth, polished finish.
Design Considerations: Size and Functionality
The dimensions of your bread box should be determined by your storage needs and available countertop space. A larger family might require a more spacious box, while a smaller household could opt for a more compact design. Consider the types of bread you typically store; a tall, narrow box might be ideal for baguettes, while a wider, shallower box would better accommodate loaves of sourdough.
Beyond size, consider functionality. Some designs incorporate ventilation slots for optimal airflow to prevent mold growth. Others might feature a hinged lid for easy access, or a sliding top for a more minimalist aesthetic. The inclusion of a cutting board on the top surface can add practicality and enhance the overall design.
DIY Bread Box Projects: A Step-by-Step Guide
The following projects offer varying levels of complexity, catering to both novice and experienced DIY enthusiasts.
Simple Box Design: A Beginner-Friendly Project
This project uses simple joinery techniques and readily available materials, making it suitable for beginners.
- Cut the wood: Cut four pieces for the sides, one piece for the bottom, and one for the top. Ensure precise measurements to ensure a tight-fitting box.
- Assemble the sides: Use wood glue and screws or nails to assemble the sides to the bottom piece, creating a sturdy base.
- Attach the top: The top can be attached using hinges for a hinged lid or simply glued and screwed in place for a simpler design. Consider adding simple latches for added security.
- Sand and finish: Once the box is assembled, sand thoroughly and apply your chosen finish. A natural oil finish will enhance the wood grain, while a paint finish can add a pop of color.
Advanced Design: Incorporating Dovetail Joints
For a more sophisticated and structurally robust bread box, consider employing dovetail joints. This traditional joinery technique creates a strong and visually appealing connection between the sides and the bottom.
- Cut the dovetails: This requires precision and specialized tools like a dovetail saw and chisel. Numerous online tutorials and videos can guide you through this process.
- Assemble the box: Carefully fit the dovetail joints together using wood glue. Clamps are essential to ensure a tight and even bond while the glue dries.
- Attach the top: As with the simpler design, the top can be hinged or simply attached.
- Sand and finish: Sanding is crucial to ensure a smooth surface after cutting the dovetails. Apply the desired finish.
Creative Variations: Adding Unique Touches
To personalize your bread box, consider incorporating unique design elements:
- Inlay: Add decorative inlays of contrasting wood or other materials for a visually stunning effect.
- Carving: Carve simple designs or patterns into the wood for added texture and personality.
- Metal accents: Incorporate metal hinges, latches, or handles for a touch of industrial chic.
- Painted designs: Add a splash of color or a custom design with paint or stencils.
Finishing Touches: Enhancing the Aesthetics
The finishing touches are what truly elevate a DIY project from good to exceptional. Consider the following:
Finishing Options
A wide range of finishes are available, each offering unique properties and aesthetic qualities. Oil finishes enhance the natural beauty of the wood, providing a protective layer while allowing the wood grain to show through. Varnish offers a harder, more durable finish with a high gloss or satin sheen. Paint provides versatility in terms of color and allows for creative designs. Selecting the appropriate finish depends on the type of wood, the desired level of protection, and the overall aesthetic.
Hardware Selection
The choice of hinges, latches, and handles can significantly impact the functionality and aesthetic appeal of your bread box. Opt for high-quality hardware that complements the overall design and ensures smooth operation. Consider the style and finish of the hardware to maintain consistency with the rest of the piece.
Conclusion
Creating a DIY wooden bread box is a rewarding project that allows for creativity and personalization. By carefully selecting your materials, design, and finish, you can craft a beautiful and functional addition to your kitchen that will be admired for years to come. Remember to prioritize safety during the construction process and take your time to ensure a high-quality result. The satisfaction of creating something beautiful and useful with your own hands is a testament to your craftsmanship and a delightful addition to your home.
Budget-Friendly DIY Wooden Bread Box Ideas for Home Use

Budget-Friendly DIY Wooden Bread Box Ideas for Home Use
Maintaining the freshness of bread is a culinary pursuit often overlooked, yet crucial for preserving both taste and texture. While commercially available bread boxes offer convenience, their cost can be prohibitive. This article explores several budget-friendly DIY wooden bread box projects, suitable for home use, emphasizing practicality and aesthetic appeal without compromising on quality.
Selecting Your Materials: A Foundation for Success
The foundation of any successful DIY project lies in the careful selection of materials. For a cost-effective wooden bread box, reclaimed or repurposed wood offers a sustainable and economical option. Consider exploring local salvage yards, antique shops, or even your own garage for potential materials. Alternatively, affordable softwoods such as pine or fir are readily available at most lumberyards, providing a workable base for your project.
Reclaimed Wood Options: Charm and Sustainability
Reclaimed wood offers a unique aesthetic, lending character and history to your bread box. The inherent imperfections, such as knots and variations in color, contribute to its rustic charm. However, careful inspection is vital. Ensure the wood is free from significant rot, insect infestation, or warping that could compromise the structural integrity of your bread box. Thorough cleaning and sanding may be necessary to prepare the wood for assembly.
Affordable Softwoods: A Practical Choice
Softwoods like pine and fir are readily accessible and inexpensive. Their relatively soft nature makes them easy to work with, making them ideal for beginners. While they might not possess the same rustic character as reclaimed wood, their affordability allows for experimentation and creative freedom. Opt for wood that is properly seasoned to minimize warping and cracking during the construction process.
Essential Hardware and Tools
Beyond the wood itself, you will require several tools and hardware components to complete your DIY bread box. These essentials should be carefully considered to ensure a smooth and efficient construction process. Investing in quality tools will ultimately save time and effort, resulting in a superior finished product.
- Measuring tape and pencil: Accurate measurements are paramount for precise cuts and assembly.
- Hand saw or circular saw: Choose a tool appropriate to your skill level and the type of wood you are using.
- Wood glue: Essential for creating strong joints.
- Clamps: To hold pieces together securely while the glue dries.
- Sandpaper (various grits): For smoothing surfaces and edges.
- Wood stain or paint (optional): To enhance the aesthetic appeal of your bread box.
- Hinges: To create a functional lid.
- Screws or nails: For securing hinges and other components.
- Drill (optional): For pilot holes to prevent wood splitting when using screws.
Design Considerations: Form Meets Function
The design of your bread box should balance aesthetic appeal with practical functionality. Consider the size required to comfortably accommodate your typical loaf of bread, along with the desired style to complement your kitchen decor. Simple, classic designs are generally easier for beginners, while more intricate projects allow for greater creative expression.
Simple Box Design: A Classic Approach
This design involves constructing a basic rectangular box with a hinged lid. It’s straightforward to build, requiring minimal woodworking skills. Focus on precise cuts and strong joints to ensure a durable and attractive bread box. This design can be further customized with various finishes, including natural wood stains, painted surfaces, or decoupage techniques.
Elevated Box Design: Adding Height and Visual Interest
By incorporating small feet or legs, you can elevate the box from the countertop, improving air circulation and preventing moisture buildup underneath. This design adds a touch of elegance and can be easily achieved by using small wooden blocks or decorative metal feet. The added height also makes cleaning underneath the bread box easier.
Incorporating Ventilation: Maintaining Bread Freshness
Proper ventilation is crucial for preventing mold and preserving bread freshness. Consider incorporating small air vents into the design, either by drilling holes or creating slats in the sides or lid. These vents allow for air circulation, preventing excessive moisture from accumulating inside the bread box.
Construction Techniques: Step-by-Step Guidance
The specific construction steps will vary depending on the chosen design. However, certain principles apply across all DIY wooden bread box projects. Precise measurements, strong joints, and careful finishing are key to ensuring a durable and aesthetically pleasing result. Refer to detailed woodworking guides and tutorials for more specific instructions based on your chosen design.
Cutting and Assembling the Box
Begin by carefully measuring and cutting the wood pieces to the desired dimensions. Ensure all cuts are square and accurate to facilitate easy assembly. Use wood glue and clamps to secure the joints, allowing ample drying time before proceeding to the next step. Consider pre-drilling pilot holes for screws to prevent wood splitting, especially when working with harder wood.
Attaching the Hinges and Lid
Attach the hinges to the box and the lid securely, ensuring proper alignment and functionality. Use screws or nails appropriate for the wood type and hinge size. Check the lid's movement to ensure a smooth and secure closure. Adjust the hinge placement if necessary to fine-tune the operation.
Finishing Touches: Sanding and Finishing
Once the box is assembled, thoroughly sand all surfaces to remove any rough edges or splinters. Start with coarser sandpaper and gradually move to finer grits for a smooth finish. Apply your chosen stain, paint, or other finishing treatment, following the manufacturer's instructions. Allow ample drying time before handling or using the bread box.Beyond the Basics: Adding Personal Touches
Once the fundamental construction is complete, consider adding personal touches to truly make your bread box unique. This can range from simple embellishments to more elaborate decorative elements, all reflecting your individual style and preferences.
Decorative Hardware: Enhancing Visual Appeal
Replace standard hinges with decorative ones made from brass, wrought iron, or other attractive materials. Consider adding a unique latch or clasp to enhance both functionality and aesthetics. These small details can significantly elevate the overall look of your bread box.
Customizable Finishes: Expressing Personal Style
Experiment with various finishing techniques to achieve the desired aesthetic. A natural wood finish highlights the grain and texture of the wood, while paint allows for vibrant colors and customized patterns. Consider using decoupage techniques to add images or patterns, or explore wood burning for a more rustic feel.
In conclusion, crafting a DIY wooden bread box is a rewarding project that combines functionality and creativity. By utilizing readily available materials and employing basic woodworking techniques, you can create a beautiful and practical addition to your kitchen while significantly reducing costs compared to commercially available options. Remember to prioritize safety and accuracy throughout the construction process, and enjoy the satisfaction of creating a unique piece for your home.
Functional Wooden Box Designs for Garage Use

Functional Wooden Box Designs for Optimized Garage Organization
The garage, often relegated to a space of haphazard storage, can be transformed into an organized and efficient area with careful planning and the strategic implementation of functional storage solutions. Wooden boxes, crafted with thoughtful design, offer a versatile and aesthetically pleasing approach to garage organization. This article explores several functional wooden box designs tailored to meet the diverse storage needs of a typical garage environment.
Designing for Specific Garage Needs
The effectiveness of a wooden box design hinges on its ability to cater to specific storage requirements. A generic approach rarely yields optimal results. Instead, careful consideration should be given to the types of items to be stored, their size and shape, and the overall layout of the garage space. This necessitates a tailored design process, encompassing material selection, dimensioning, and the incorporation of specialized features.
Categorization and Item-Specific Boxes
One effective strategy is to create a system of categorized storage. This involves designing different types of wooden boxes to accommodate specific items. For example:
- Tool Boxes: These boxes can be designed with internal dividers and compartments to organize hand tools, power tool accessories, and smaller hardware items. Consider using robust hinges and latches to ensure secure closure.
- Hardware Boxes: Smaller boxes, perhaps with drawers or sliding trays, are ideal for organizing nails, screws, bolts, and other small fasteners. Clear labeling is crucial for efficient retrieval.
- Seasonal Item Boxes: Larger boxes, potentially with lids that seal tightly, are suitable for storing seasonal items such as holiday decorations, sporting equipment, or clothing. The dimensions should be tailored to the largest item to be stored.
- Automotive Parts Boxes: These boxes may need to accommodate irregularly shaped parts, requiring custom-designed internal configurations or the use of flexible dividers. Consider the weight of the stored items when choosing the wood type and construction.
Modular Design for Adaptability
A modular design approach provides significant flexibility. This involves creating a series of uniformly sized boxes that can be stacked, arranged, and rearranged as needed to adapt to changing storage needs. Uniformity simplifies the visual aesthetic and maximizes space utilization. Consider using standardized dimensions to ensure compatibility between different boxes. The use of interlocking mechanisms or standardized stacking cleats can enhance stability and prevent shifting.
Material Selection and Construction Techniques
The choice of wood significantly impacts the durability, longevity, and aesthetic appeal of the wooden boxes. The garage environment, characterized by fluctuating temperatures and potential moisture exposure, necessitates careful material selection.
Wood Species Considerations
Several wood species are suitable for garage storage boxes, each offering a distinct balance of strength, durability, and resistance to moisture. Cedar and redwood are naturally resistant to rot and insects, making them excellent choices. Pressure-treated pine offers an economical alternative with good durability, while oak and maple provide exceptional strength and longevity but are more susceptible to moisture damage without proper treatment. Consider applying a protective finish such as marine-grade varnish or paint to further enhance durability and moisture resistance.
Construction Methods and Joints
Robust construction is paramount for long-lasting boxes that can withstand the rigors of garage storage. Several joinery techniques offer superior strength and durability compared to simpler methods:
- Mortise and Tenon Joints: These offer exceptional strength and a clean aesthetic. They require more skill and precision but result in extremely durable boxes.
- Dovetail Joints: These intricate joints are known for their strength and elegance, though they are relatively complex to execute. They are ideal for boxes intended to hold heavier items.
- Rabbet Joints: Simpler than mortise and tenon or dovetail joints, rabbet joints provide good strength and are easier to construct. They are suitable for boxes intended for lighter items.
- Biscuit Joints: These utilize small, oval-shaped biscuits to join boards, enhancing strength and alignment. They offer a good balance between strength and ease of construction.
The choice of joinery method should be based on the intended use of the boxes and the skill level of the builder. Always use wood glue in conjunction with any joinery method to further enhance strength and durability.
Enhancing Functionality with Added Features
Beyond basic design, incorporating additional features can significantly enhance the functionality and convenience of wooden storage boxes.
Hardware and Fasteners
The selection of hinges, latches, and handles is crucial. High-quality, heavy-duty hardware is essential to ensure long-lasting performance and prevent premature wear. Consider using stainless steel or zinc-plated hardware to resist rust and corrosion in the garage environment. For larger boxes, consider incorporating robust locking mechanisms for added security.
Internal Dividers and Compartments
Internal dividers and compartments provide organization within the boxes, preventing items from shifting and becoming jumbled. These can be custom-designed to fit specific items or created using readily available materials such as plywood or plastic dividers.
Wheels and Casters
For larger and heavier boxes, incorporating wheels or casters facilitates easy movement. This is particularly beneficial for boxes containing infrequently accessed items. Choose high-quality casters rated for the weight capacity of the box.
Labeling and Identification
Clear and concise labeling is crucial for efficient retrieval of stored items. Use durable labels made from weather-resistant materials and a permanent marker to ensure longevity. Consider a standardized labeling system to maintain consistency across all storage boxes.
Conclusion
Custom-designed wooden storage boxes offer a superior solution to garage organization compared to generic plastic bins or shelving units. By carefully considering the specific storage needs, selecting appropriate materials and construction methods, and incorporating functional features, homeowners can create a system of durable, aesthetically pleasing, and highly efficient storage solutions. The result is a more organized and functional garage space, enhancing both convenience and the overall appeal of the home.